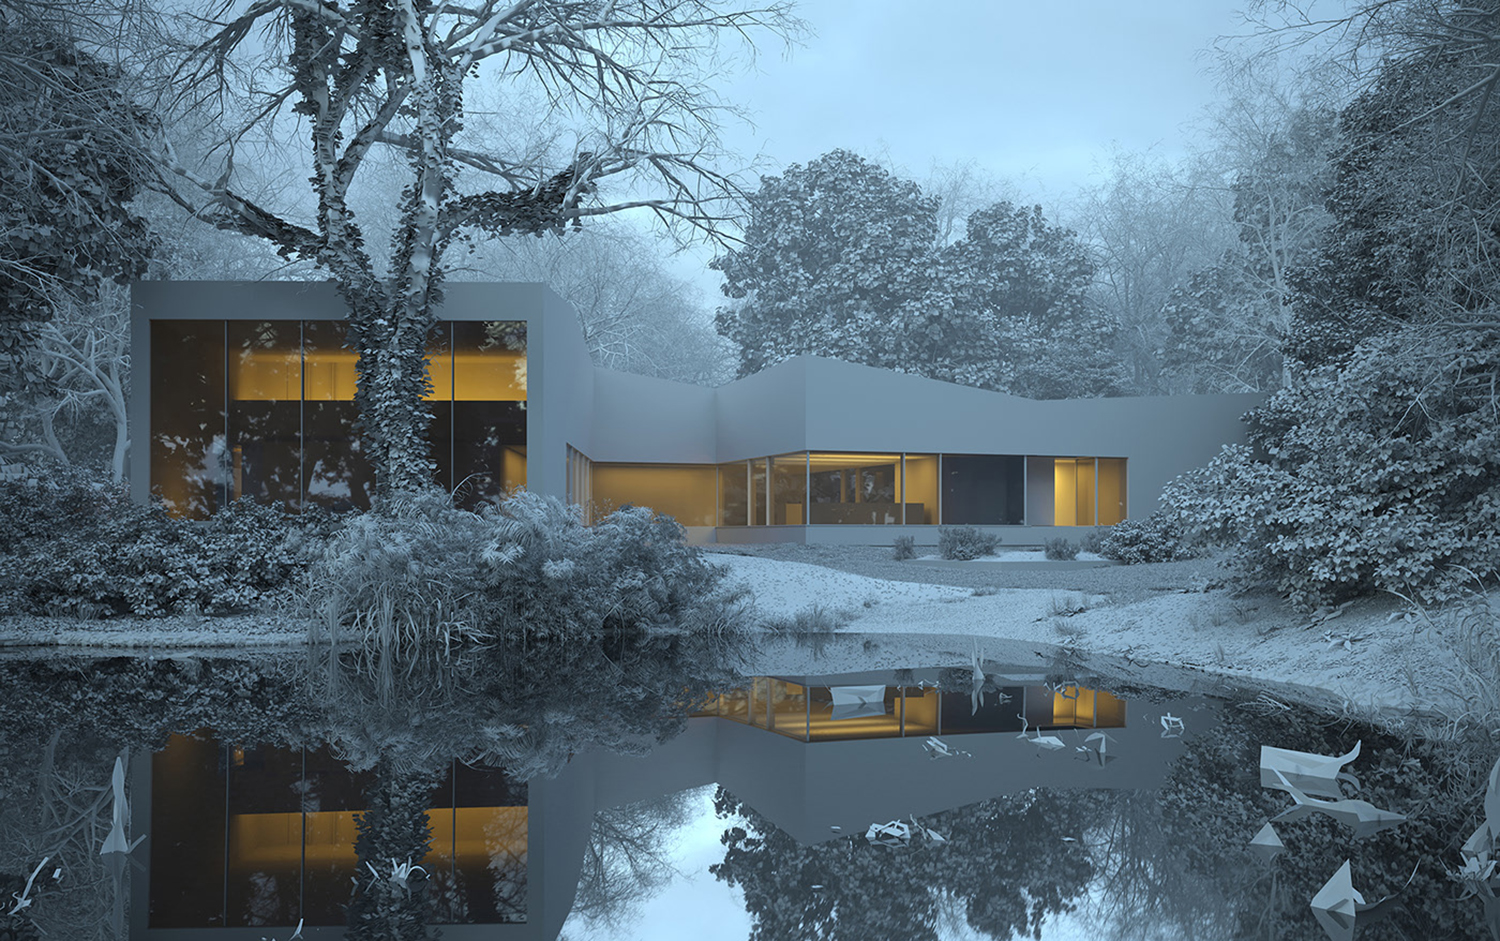
Getting into architectural visualization has never been easier. An increasing number of young enthusiasts are seeing it as a great way to turn their hobby into a profession. The first steps seem easy — put up a couple of boxes for walls, add a sun and sky system, buy a few furniture pieces online and voilà — you have an interior render.
In partnership with
![]()
However, once they get into more serious production, the importance of planning, proper modeling and time management becomes apparent. The following tips will help you employ some of the most important practices in becoming more methodical — and therefore more time-efficient — in your rendering process. These tips apply to 3ds Max in general, but most can be adapted and applied for a wide variety of rendering engines and project types.
1. Optimize your scene.
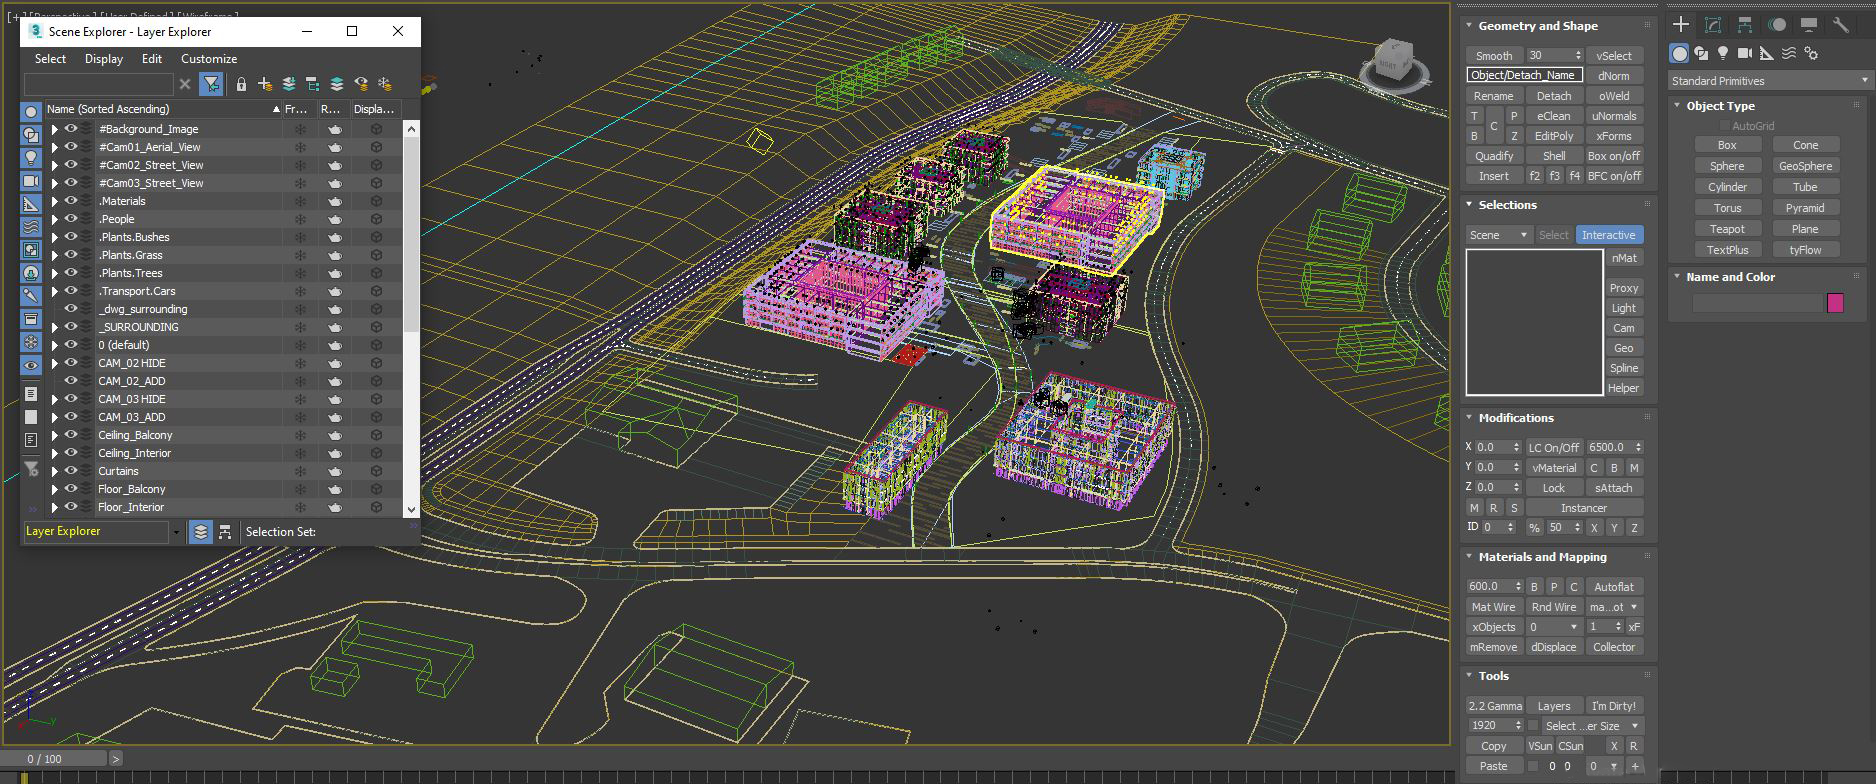
It is important to maintain good hygiene in your scenes — while they start small, they can quickly grow to mammoth scale. If there is a structure to your scene, adding assets, lights and materials won’t compromise its stability and responsiveness. Get accustomed to using layers and naming your geometry. Make instances instead of copies, and use groups (but avoid nested groups). Before you start working, check the scale of your scene.
Different units can create havoc when merging scenes created in different scales — it can especially mess up your lights and textures. Check ‘compress’ on save for all files, especially when working with large scenes. I use SiNi Software’s Forensic, a scene checker and repair tool that scans scenes in order to find problematic elements like standard and Autodesk materials, objects with no assigned materials, missing plugins and unused layers, to name a few. I run my scenes through Forensic every time before rendering.
2. Create a holistic model from the beginning.
It may seem counterintuitive but, in order to save time, try not to model only what you might think the camera will see. Aiming for time-efficiency means you have to look a few steps ahead and prepare for the possibility your camera view will change significantly. Sometimes, even if the client has selected a view, they might do a 180 (literally) later on or commission additional images.
Obviously, you should discourage these types of changes at the beginning of a project, but there might be instances when you’re prepared to renegotiate and meet them half-way. The modeling and scene preparation phase usually takes the longest and if you cut corners at the beginning you might face problems updating the model for, what the client thinks is a simple camera adjustment.
3. Keep your polygon count as low as possible.
Keep your polygon count low. If you’re working with repetitive elements such as railings, fences and doors, attach all identical objects into a single piece of geometry — 3ds Max handles fewer large objects better than many smaller ones. Try to model in quads and use smoothing groups more frequently than the Turbosmooth modifier. Make sure you weld all vertices and check the geometry for flipped polygons. Keep your stack procedural whenever possible since this will allow you to go back and modify the geometry from its initial state.
Try to learn other 3D software such as ZBrush for sculpting and adding fine details to your objects, Marvelous Designer for cloth (curtains, pillows, bedding and blankets). Different industries and niches within architectural visualization use different modeling software. It is useful to explore how to migrate files from one to another.
4. Check your imported assets.
Most visualization artists buy 3D assets such as furniture, lighting and plants. Although most of the websites selling these scrutinize the models before making them available for purchase, every now and then you encounter files that have bugs, unused helpers, dummies, missing textures, standard materials, etc. If you simply merge these into your scene, before you know it your scene will begin to crash and stall.
Some of these models use textures with generic names like diffuse.jpg, leaves.jpg, wood diffuse.jpg, etc. When you place all of the textures used in your scene into the same project folder, these may get overwritten. Use Asset Tracking religiously every time you import something. If you neglect doing this, you’ll have to manually check every texture. The RelinkBitmaps plugin can be of great help here.
If you’re working on a large scene where you need to add a large number of people – on public squares, sidewalks, balconies – you might want to check out Advanced Painter. This tool can be used for any type of task where you need to scatter objects, but I found it useful for adding people too. It gives you the option to practically paint 3d people anywhere in your scene.
5. Don’t overcomplicate your materials.
Try not to overcomplicate your materials. There are instances where you’ll have to use complex material structure to achieve a certain look, add some rust or scratches, but most mainstream clients prefer clean materials that look new. Any sort of patina should be introduced with a light touch. Consider the resolution of the textures – 8k resolution for anything other than closeups is an overkill. Create your own library of materials which you can tweak to different scenes.
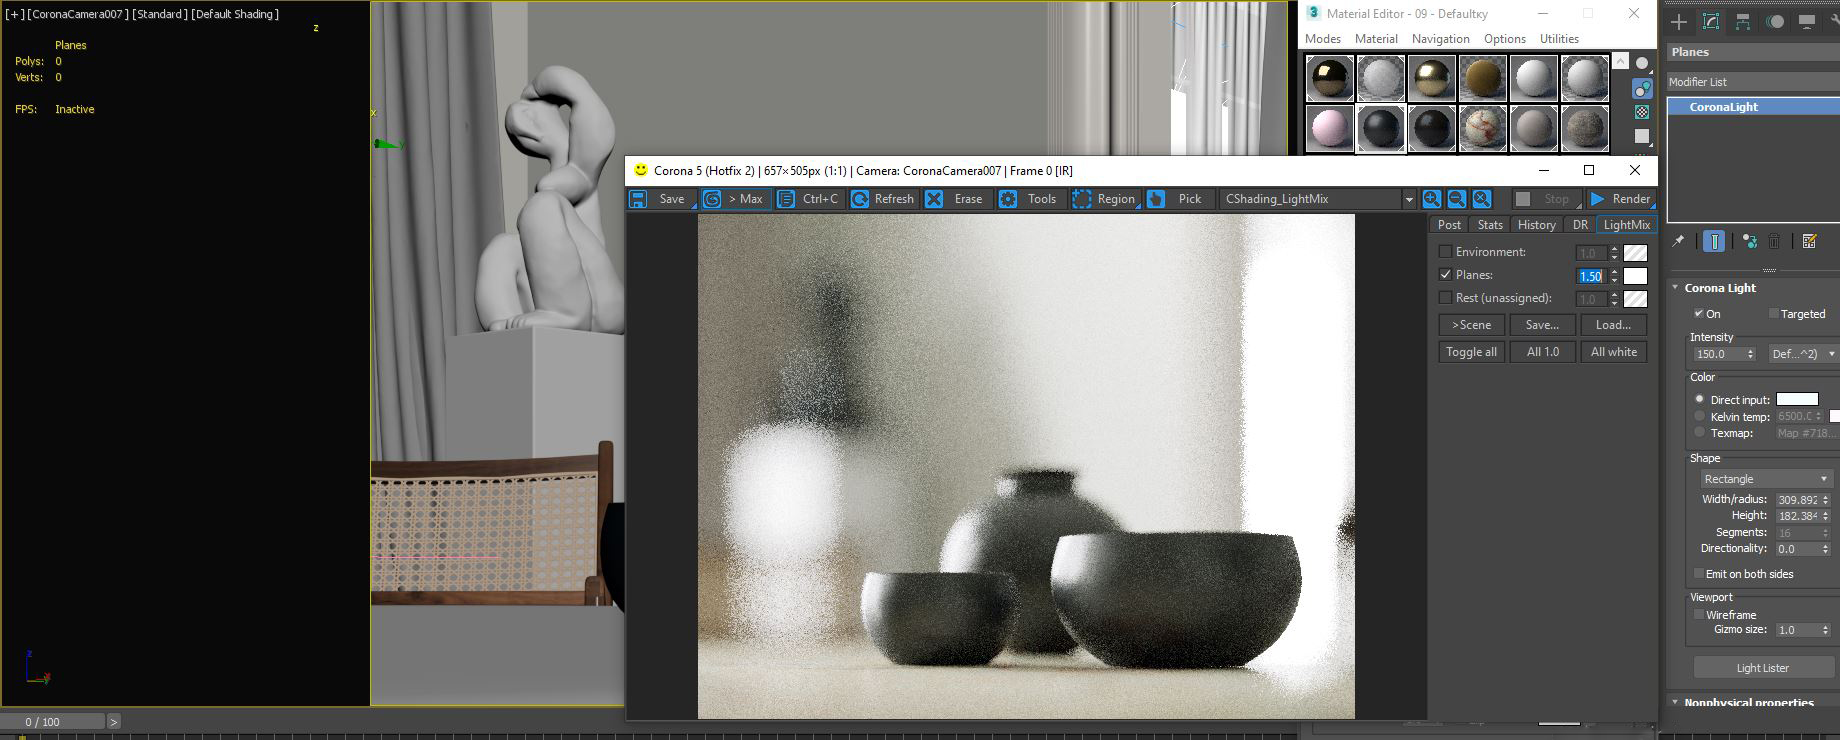
6. Keep your lighting simple.
The same goes for lighting. Start with your main light source and add fill lights sparingly. Most of the time, when I have the opportunity to explore working files of an image I admire, I am surprised by the simplicity of its setup — lighting included. Use real-world values and, if you have to push toward an extreme, it’s better if your raw render is slightly underexposed than overexposed. Fixing burnt out areas in post is far more difficult than adding highlights.
7. Be selective when testing your final image.
Turn off DR (distributed rendering) when testing, especially if you’re rendering regions. If you’re working on large scenes and want to test the lighting or a specific material, hide everything in your scene that doesn’t greatly affect the final look. Use default values in Render Settings unless you see excessive noise, fireflies or similar artefacts. It is always best to start with lower values and progressively bump them up. This will keep you render times lower.
Architects: Showcase your next project through Architizer and sign up for our inspirational newsletter.
The post The Art of Rendering: 5 Time-Saving Modeling and Rendering Tips appeared first on Journal.